
Leaving areas of your paper white when applying your background color is as easy as using pieces of torn or cut paper! I had scraps of white copy paper left over from cutting out my zendoodles, so I decided to tear some of them into random shapes to use as masks before painting my background with water color.

I moved them around on the pages until I had a pleasing arrangement, and I decided to use a wash of watercolor in blues and purple. I held the torn paper down by using my index finger in the middle of each piece.

Using this method, I found it best to apply the paint from the center of the torn paper to the outside of the pages. This was to reduce any bleeding of the paint beneath the masks.


Then I took a wet brush and lifted the paint to make "wings" on the angels. I also added a horizon and tree line.

I continued working on my pages by adding background trees in a medium blue, working darker and darker until I was using black for the foreground trees. I also added black to the kneeling figure. I used about a 50/50 solution of artist acrylic and water to highlight the angels making sure that the trees and branches would show through the angels so they would appear to be transparent.
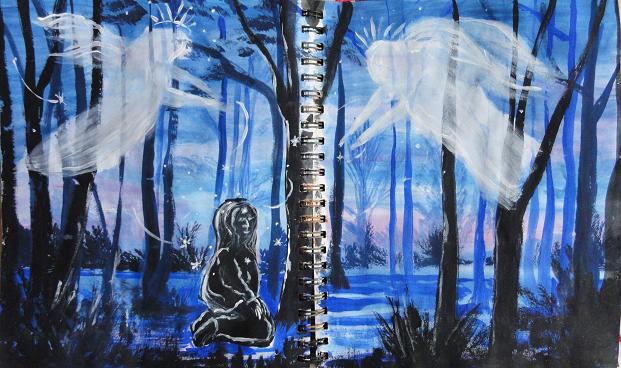
I finished the pages by adding some directional strokes on the angels and wings, highlights on the kneeling figure, and little star shapes and swirls. I also added some highlights to the tree trunks in the foreground.
Masking with paper is a quick way to give your pages some added dimension. Try applying paint, then masks, then more paint. The possibilities are endless!

And don't forget to save those pieces of paper that you've used for masking. They'll be great collaged as additional texture on those next journal pages. Whatever you do, remember, "Celebrate, LOVE, and Create!"
Great idea and great step by step. thanks for sharing
ReplyDeleteLee:)
Excellent tip!!
ReplyDeleteGreat pages, it's always interesting to see what develops when you start out with blank spaces. I love the direction yours have taken.
ReplyDeleteThanks for the tip. I want also thank you for the workshop 21 secrets. The first time when i read it i was thinking that is nothing for a Dutch girl, But it really helped me.I never took the time to thank you. And now i found you, so THANKS.
ReplyDelete