Showing posts with label tuesday tips and techniques. Show all posts

Tuesday, May 14, 2013

Tuesday Tips and Techniques: Photo Editing

Can't find time to play in your journal but you've taken lots of photos?  You can still let your creativity flourish by being creative with photo editing. 

Here are some of the photos I played with over the past two weeks using free, online photo editing programs.

After a couple modifications to the photo below, and a couple keystrokes using FotoFlexer, Voila! I've got a neon Nick!


A little cropping and color boosting brought this Thai restaurant character to life. 

Multiple functions in iPiccy helped to re-create this photo of Nadia.

This photo of fruit taken at the West Side Market in Cleveland looks even more luscious cropped and colorized using iPiccy.


And here are the newlyweds, Nick & Heather!  More cropping with some other photo effects and desaturation make this photo feel soft and nostalgic. ( Congratulations to the new couple!)   


I've used other free, online photo editing programs such as Pixlr (which is what I've used most frequently over the past few months) and PicMonkey.  Each program offers different items that I enjoy using, and I'm just beginning to become familiar with each of these sites.  I'll try to do a more in-depth review of each specific site in the coming weeks.  Do you have a favorite online photo editing program that you enjoy using?  If so, tell us all about it in the comments section of this post!

I hope you're finding lots of time for creativity whether it's in your journal, at the easel, with your camera or - just in your head!

CELEBRATE * LOVE * CREATE

Tuesday, April 23, 2013

Tuesday Tips and Techniques: Make Poetry Tiles!


Have you ever played with poetry tiles or magnetic poetry before?  I think it's both fun and thought provoking to arrange and re-arrange these little word tiles into poetry.  There are several sources of online poetry tiles to explore, but why not make your own to incorporate into a journal page?


I created my tiles in  the Paint program by first making the little "tiles".  Then I entered the text, and lastly, I filled in the background with a light gray to further isolate the tiles.   I took my laptop out on the deck and randomly typed words that came to me as I abandoned all my senses to the beautiful afternoon.

To get you started on your own poetry tiles, I'm offering my set for you to download and use as you would like!  I printed my words as two 5" x 7" sizes for my 4" x 5" journal.  If you're using an 8" x 10" or larger journal, I suggest printing them out as a full page.  Don't see a word you would like to use?  Make some of your own tiles to add to them!  It doesn't matter if the font or size is different - it will just make it more interesting.


I hope you're having a fabulous day, and I hope the promise of spring is blooming among your flowers too!  If you create a page using these tiles, be sure to share a link to your work in the comments section of this post.  We would all love to see what you do with them!


CELEBRATE * LOVE * CREATE

Tuesday, April 16, 2013

Tuesday Tips and Techniques: Add More Pages!

Are you working in a "page a day" journal and need more room to work on a given day? 


With a little decorative tape and previously prepared background papers, you can have additional, accordion fold pages in a flash!


 Here, a strip of animal print Duck Tape cut creatively, binds my accordion fold pages to today's page in my journal.


Now I have 9 pages to work with today - that's plenty of room to experiment with ideas for the Skull & Skeleton show upcoming later this fall.
 

CELEBRATE * LOVE * CREATE

Tuesday, February 19, 2013

Tuesday Tips & Techniques: Cardboard


You're not really going to throw out all that luscious cardboard are you?

I was hoping you would save at least a little of it!  There are so many ways you can use it for your art journal and altered book projects.  Here are 10 ideas right here.

1.  Art Tags                                             6.  Art Stencils
2.  Art Dolls                                            7.  Art Tools
3.  Art Journal Covers                             8.  Art Pockets
4.  Art Journal Pages                               9.  Art Postcards
5.  Art Embellishments                          10.  Art Templates

I'll share some techniques using these ideas in the coming week.  Next week I'll show you ideas for making tags that incorporates using those scraps on your table.

CELEBRATE * LOVE *  CREATE

Tuesday, November 20, 2012

Tuesday Tips and Techniques: Use Your Printer!

When we were on vacation in Missouri, Suzi and I had our afternoon at Hobby Lobby.  (Of course we did!) I was watching my pennies, after all, I still had lots of shopping opportunities awaiting me in California.

While we were at Hobby Lobby, I found a great 12" x 12" sheet of scrapbooking paper that was tiny, handwritten words.  I LOVED it, but I didn't want to pay almost $2.00 for it.  So..........I took out my fine point sharpy and wrote my own words directly into my art journal.


On one side of the book, I wrote down all of the "Momisms" I could think of, and on the other side of the book, I wrote down all of the things that I could think of that make me happy.


 I took digital photos of each page, and now I have them on my computer ready to print out at a moment's notice.  I can alter the tint, reduce or enlarge sections of them, and basically alter them in any way I choose. 


So take advantage of your printer and put it to good use!  You'll save time, effort and money, and you'll have papers that are uniquely your own!

CELEBRATE * LOVE * CREATE

Tuesday, November 13, 2012

Tuesday Tips and Techniques: Playing with Paper Three

Alcohol and Acrylics

This is one of my favorite techniques for making background papers.  Here's what you'll need:

  1. Card stock pre-painted with acrylic paint. (artist or craft acrylics will both work)
  2. 91% Isopropyl Alcohol (I bought mine at Walgreens)
  3. Craft acrylics
  4. Water
Paint your card stock (or other heavy paper) with craft or artist acrylics.  You can use a solid color but I prefer mixing the paint right on the page. ( Using metallic and glitter paint yield striking results!)  Let it dry.


Get your alcohol ready by pouring a small amount into the cap.  A cap full is plenty for one or two sheets of paper.


Set your alcohol nearby.  Now mix craft acrylic with water in an approximate 60% paint, 40% water mixture.  I use an egg carton.  Apply the paint to your page with a brush.  Work quickly because you don't want the paint to start drying.  If it seems like it's drying too fast, add another brush full of water.


While it's still glistening wet, begin dropping alcohol into the wet paint.  I do this using my index finger to flick the alcohol onto the page.  I also sometimes sprinkle the alcohol directly from the cap by tapping my finger on the cap.  Experiment with the application!


The alcohol reacts with the acrylic paint, and the paint spreads out away from the alcohol.  Here I've used a contrasting color for the top layer so there would be more contrast, but for more subtle texture, use similar colors.


You'll have a stack of yummy, textured paper in no time with this technique!

CELEBRATE * LOVE * CREATE

Wednesday, November 7, 2012

Tuesday Tips and Techniques: Duct Tape Journal

Today I'm sharing a technique by one of my favorite art journalers, Diana Trout.  I've seen this technique mentioned on some of my favorite blogs recently, and I wanted to make sure that you didn't miss it!

You know I'm big on re-purpose and re-cycle, and this project is perfect for all of those wonderful paper scraps that you have tucked away or stacked all over your work space.  If you're like me, there are maybe several stacks!

If you're not familiar with Diana Trout, definitely take the time to view her other wonderful videos. 


I'm going to show you my take on this technique in the next couple weeks.  That will give me some incentive to clean up my messy piles and make room for brand new messy piles in the new year!

CELEBRATE * LOVE * CREATE

Tuesday, October 23, 2012

Tuesday Tips and Techniques: Playing with Paper Two

Acrylic Paint Stamp Technique


This technique takes some prep, but once the prep is over you can design LOTS of paper!  The first order of business is to gather all of your supplies.  You will need stamps, stencils, card stock (or other paper - experiment! When Barb and I did this technique in her studio, we also used muslin fabric and it worked great.), craft acrylics, a paint brush, containers for mixing, water, paper towel (or white shop towels - these will act as your stamp pad), and a brayer (I actually used an old rolling pin).


The next step is to select your colors.  You want to choose three or four colors that are relatively analogous (next to each other) on the color wheel.  For example, you don't want to choose red and green or add yellow and purple together because they will become brown.  Of course, if you're looking for lovely browns, this is a good way to go.

You're going to mix your craft acrylics with water in an approximate 50/50 mix.  You want to make it similar to ink consistency.  I used an egg carton to mix my paints, filling each cup about half full.  Sparkly and metallic paints turn out great using this technique.


Next, you need to prep what will be your "stamp pad" by folding your paper towel or shop cloth.


I used a shop cloth.  First, I folded it into quarters...


Accordion-folded it all the way across, and then folded it onto itself into thirds.


Now the fun begins!  This is going to be messy, but it's going to yield lovely results.  Take a paint brush and begin applying your paint mixes to your folded towel.


Make sure the towel is totally saturated with your paint mixtures.  Open your towel in sections and be sure to get paint on every white surface.


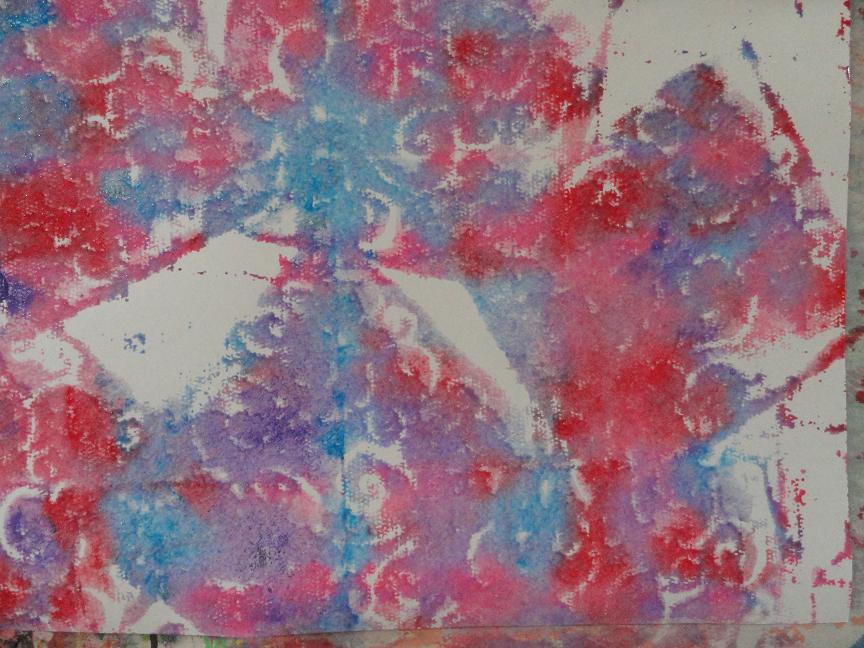
You'll end up with a totally saturated, beautiful "stamp pad".  Now it's time to decorate some paper!  Choose your first page and lay your painted towel on top of it.


I've selected one of my Styrofoam stamps to being.  I pushed the stamp into the towel in different positions.  Part of the excitement of this method is that you don't know what you're getting until you lift the towel.


I wonder how these leaves will print?  I'll just lay them out on the paper and use the rolling pin across them.


Wow!  I like the way these turned out.  I like them a lot!


Just tossing your towel unto the paper in a haphazard fashion will put a few interesting lines and creases on the page.


I decided to use this piece of fencing that I brought back from Barb's - Thanks, Barb!


I used some more of my homemade, Styrofoam stamps...

....and then I experimented with a piece of needlepoint plastic I have.  It turned out to be one of my favorite results.


I decided to re-position my towel and add some additional stamping to the mesh background.  I like!


Combining several stamps yields surprising results.


The more you print, the softer the prints become.  I printed eleven pages with this towel, but I could have printed another half dozen.  Don't even think about throwing the towel into the trash! Let it dry and you can use it in another project.  If you've used two-ply paper, you'll be able to pull it apart when it dries.


These papers dry rapidly, so once you've finished with first printing, you can prepare a second towel and apply additional prints over your first.  You'll get some great results.   I used turquoise, light green, and gold mixes for my second printing, and I'm quite pleased with my finished papers.


I hope you'll give this technique a try.  You'll have a lot of fun and you'll be surprised at how many wonderful combinations you come up with as you're experimenting.  The only problem will be what to do with all these wonderful papers once you've finished!  Now what will I do to complete the back of these papers?

CELEBRATE * LOVE * CREATE
Related Posts with Thumbnails