Showing posts with label travel journal pages. Show all posts

Monday, October 1, 2012

Monday's Musings

Welcome October!


October is my favorite month of the year.  I love everything about it; the crisp, clean air, the dramatic skies, the smell of homemade baked goods fresh out of the oven.  October means it's time for sweaters, dark evenings spent snuggling or putting puzzles together, and drives into the country to admire autumn's lovely colors.  Summer's hectic pace slows down and BBQs rapidly become apple shopping and costume parties.  Welcome October!

GLITTER AND A MOVIE


Photobucket

Shorter October days also mean longer evening hours and more time to watch movies!  A Little Shop Around the Corner  is hosting  "Glitter and a Movie", a movie-themed creative challenge.  This month's movie challenge is "When Harry Met Sally".  The challenge is this:  Create a work of art inspired by the movie.  I'm in!  Artwork for this challenge is due October 12, 2012.  Click on the challenge button to learn more about participating.

My Travel Journal Continued

I'm making progress on my travel journal each day.  I really like the way my typed descriptions are tying everything together, but it is a time consuming process.  I'm "roughing in" all of the pages for now, and when my book is complete, I'll go back and add some artistic details.  

DAY 5
A Day to just hang out, only leaving the house for meals.  I'll add  darker paint and stars around the dome , and other details from our night tour of Mizzou campus.

I've attached the entire Andy's carry-out menu and added a photo of the sundae I got.


I didn't take photos of our lunch at Tony's Pizza Palace (I was SO hungry!), but I was able to  pull images from the Internet.
 DAY 6
It's STILL smoldering outside, but not so hot we stay at home today!  Five Guys for lunch,  Hobby Lobby for the afternoon, and an evening of music with Johnnie.

Five Guys Burgers and Fries has paper and crayons on hand for leaving messages on their bulletin board.  Here's a photo of my masterpiece..."Cleveland Rocks" on top, and "Greetings From Ohio" written on the bottom.  I've printed out my photo and applied it to a tag - tucked into a Five Guys' envelope for gift cards.

I bought my first alcohol inks (and I'm having fun with them!)  I applied each color to a tag and attached the tag to the page.  I'll go back later and label the name of each color.

I found these great ribbons (also on sale!) at Hobby lobby.  I cut a section of each ribbon and  glued them to the edge of the page as tabs.
 DAY 7

Our trip to St. Charles and overnight stay in a hotel near the airport (since we had to be there by 4am!!!) We arrived at the hotel before check-in, but the very gracious staff served us coffee in the beautiful lobby.  The mosaic tiled fireplace was gorgeous.  I'm not sure what I'll do with all the blank space on this page....

A welcome brochure is a great place to add a photo from the lobby and embellish with other  items.

Inside the brochure, I've attached a photo of our very nice  and cool room.  I'll write more notes about our stay on the piece of hotel stationary I have.


I still have room on the other side of the brochure for a couple photos and additional thoughts.  I also have  a menu from R.T. Weiler's where we finally had some BBQ.  I've incorporated photos from St. Charles and a coaster from the restaurant.

NEXT STOP:
A couple pages for our flights to Houston International Airport and on to LAX...


And finally.....our first trip to California!  I'll post these updated pages next week.  My hope is to do a video journal flip when my travel journal is completed - if my computer cooperates!


Have a great Monday and a great week, and I hope your autumn is colorful, spectacular, and filled with celebration, creativity and love!

CELEBRATE * LOVE * CREATE

Saturday, September 22, 2012

Weekend Journal

My First Travel Journal Pages

It's been a lot more time intensive than I could foresee, but finally I've got a few completed pages to share with you.  I began by typing up our itinerary.  It's fortunate that all of my photos are dated and time stamped and uploaded to the computer in order.  When one does so many different things in such a short amount of time, it's difficult to piece it all back together after the fact!

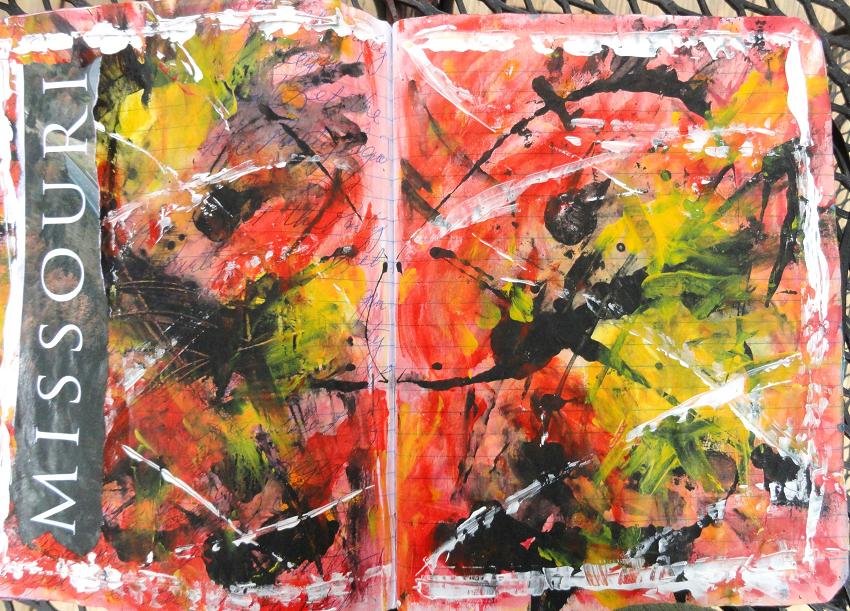
Once I typed and printed the itinerary for Missouri, I cut it apart and and put it on the left side index page (I used a combination of red double stick tape, Mod Podge, and Gel Medium as adhesives) along with some Mizzou imagery.  Columbia, MO is a college town, and they're crazy about their Tigers.


DAY 1
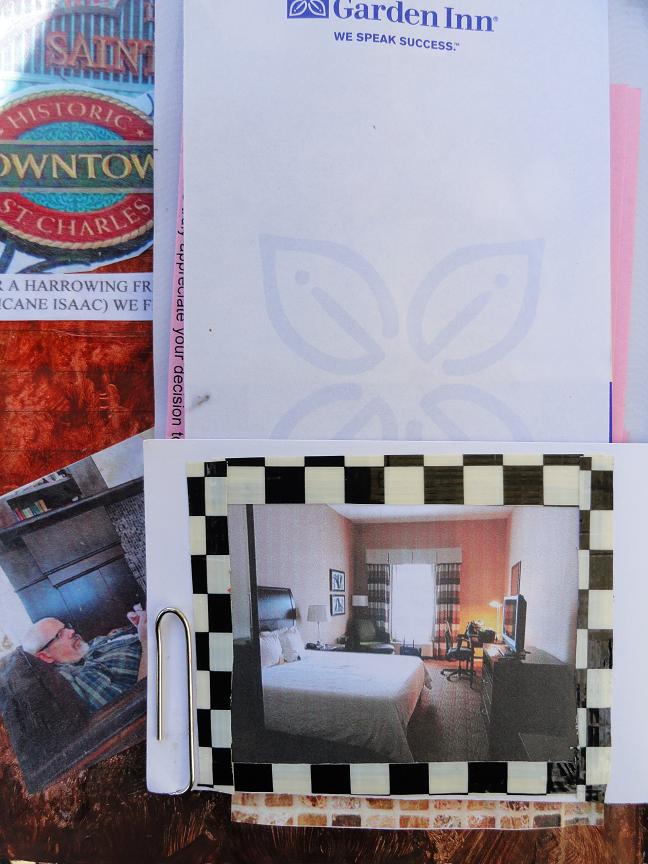
My first pages were dedicated to the whole airport and flight experience.  I think I could start a new blog on that subject!


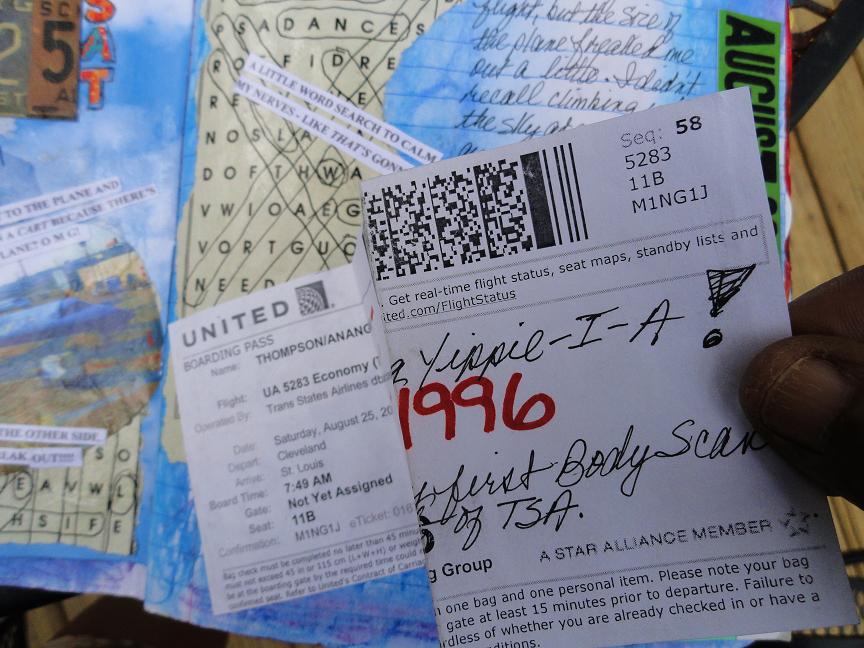
I like the vivid green of the luggage tags against the blue background.  I completed a vacation themed word search on the flight to St. Louis, so I tore the page out of my book and applied it to the background.


After we took our luggage out of the back of the car in Cleveland, I gave Madison a daughter a hug and bent down to retrieve my bags.  This embroidered heart patch was laying next to my bags - a good luck charm!


I tri-folded my boarding pass and adhered only the first section of it to my page, and wrote some blog- censored thoughts about going through security.


I've used Tim Holtz vacation stickers throughout my journal to record the day's date.  I've used a variety of other stickers for the day and/or month.


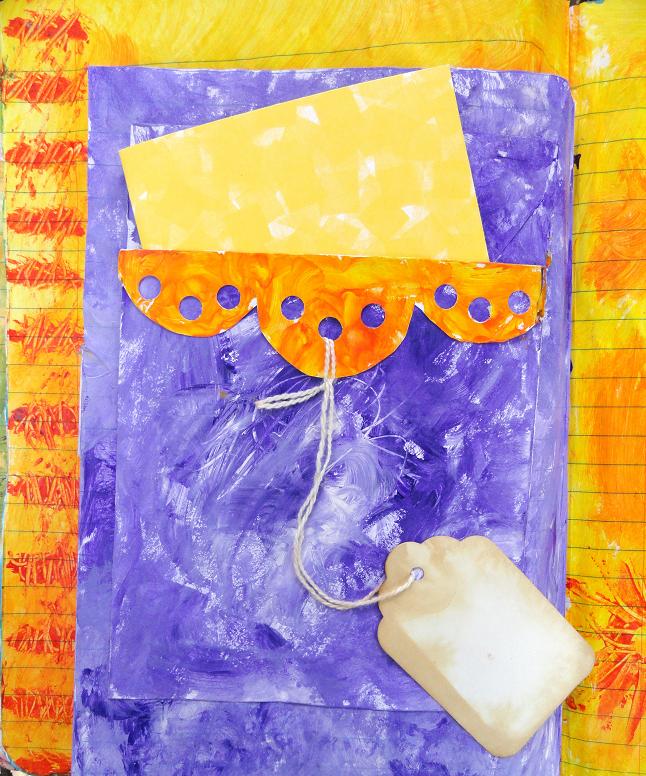
Here's the 2nd spread for our first day.  Remember how I told you whatever background color you choose seems to work?  That still amazes me as I work in this journal.


First stop - Denny's for breakfast.  Hey, a girl's gotta eat!  It's about a 2 hour trip from St. Louis airport to Columbia, and it was a nice break.  This is a Denny's magnet.  There were only two left on the table - one for me.  One for sis.  The other Denny's item is an empty sugar pack.


I started out hand writing all my little descriptive labels and using double stick tape.  I found that to be a huge pain, so I typed and printed out my thoughts and cut them out.  I applied Mod Podge to the page to adhere the labels.  Way easier.  Much more legible!   I didn't have a photo of La Siesta restaurant, so I just printed one off the Net.  I cut apart one of their business cards to make it fit on the page the way I liked.


Columbia is also a big ART town!  Also being a college town, there are boards up everywhere where posters and other advertisements are posted.  These posters for a local tattoo shop were everywhere so I'm sure they didn't miss a couple.

DAY 2
Aside from meals, Sunday was pretty much a "hang around the house and catch up" kind of day.  I loved it.
We went to Ernie's for breakfast (FABULOUS place!).  It's also a very popular place so there was quite a line to get in when we arrived.  No instant seating?  NO problem with an art gallery 2 doors down.  Most of the items on these pages are post cards, business cards and photos from Artlandish Gallery.


This is a photo I took of one of the beautiful, hand-felted, stuffed moons at the gallery.  I knew I was going to the Sawdust Festival in CA, so I refrained from buying any art in MO.  As it turns out, I only bought two greeting cards at the festival.  Hindsight....


We were hungry by the time breakfast reached the table, and when I saw those luscious pancakes I forgot I even had a camera with me.  I did manage to take a picture of Ernie's neon sign behind the counter before breakfast arrived.

 DAY 3
After a quick to Michael's so I could pick up some Mod Podge and craft paint, we took a 20 minute road trip to Boonville. (I just discovered I've been spellling it with an "e" as in Boone!)  The words that come to mind to describe Boonville are "quaint", "nostalgic", and "historic".


The highlight of our Boonville trip (besides eating lunch at the Riverside Cafe across the street from the Missouri river), was our visit to the recently restored Hotel Fredrick.  I bought this postcard in the lobby and picked up a few pamphlet freebies as well.


Since it was Monday, most of the cute galleries and artsy shops were closed.  Major BUMMER.  This store looked marvelous, and I've got it paper clipped to the little booklet between the 2 pages of this spread.


I hope this store is still there on our next visit (hopefully next year).  It's definitely on my "to do list" for MO.  I think I'll be using paper clips a lot in this journal.  I can't believe how many items I have.  Well, hoarder experienced, professional collector that I am, I guess I can believe it!


And what would a vacation be without a margarita at day's end?  Harpo's provided today's tasty beverage, and the food was pretty good too!


I hope you enjoyed taking a look at my first 3 days of vacation.  I'll post Day 4 on Tuesday as it's filled with tips and techniques.  That was my play date with the lovely Barb Owen.

VACATION PHOTOS


It was magical to awaken on Sunday morning to look out the kitchen window and see Suzie's morning glories in full bloom and spreading across the yard and into the trees.  I think I saw a fairy there.


Inside Ernie's

THE FAIRIES' TEA & GIVEAWAY

Inspiration Avenue
Don't forget to come back tomorrow for The Fairies' Tea.  It's going to be great fun, and I hear there's going to be a giveaway!

CELEBRATE * LOVE * CREATE

Tuesday, July 24, 2012

Tuesday Tips and Techniques: Travel Journal

PART THREE:  The Pages


I gave a lot of thought about what I wanted my pages and overall travel journal to look like when it's finished.  I know that I don't want it to look formal or store bought.  I know that I want it to feel very textural and I want it to be a reflection of the kind of vacation we're going to have; a fun, food, family and friend - filled two weeks!

PREPARING YOUR PAGES FOR JOURNALING:

It's important to remove some of the pages from your composition notebook (or other journal) to make room for additional travel treasures that you want to include.  If you don't remove some of the pages, your journal will be bulky and will not want to close.

I removed 2 and 3 pages at a time in my journal.  Here's how I did it:

  1. Take the first four (or 5) pages. Remove pages 2, 3, (or 4) at the red, left-hand margin.
  2. Glue page 4 (or 5) to page one. (I used Mod Podge for this)  The back of page 4 becomes the left side of your second spread.
  3. TEAR your pages.  This will give you a seamless finish when you glue your pages together.
  4. Save the pages you tear out to use in other art projects!
  5. As you near the end of your journal, begin counting your remaining pages to make sure you have enough spreads for your trip!


TIP: Take advantage of the fabulous scrapbook papers that are available!

My very first spread is devoted to an index.  I will index my pages for Missouri on the left and California on the right.  I will probably print my index directly on the page for MO, but for the darker, brick page (scrapbook paper), I think I will type and print my index titles and glue them in for a more graffiti style look.
I have painted almost all of my pages with washes of craft and artist acrylics.


My next spread is reserved for the airport and flight to MO.  I haven't flown for well over ten years so I'm sure my experience is bound to be different than I remember.  This will give me a space for writing down my thoughts at the beginning of our journey and will be something to do on the flight.


TIP: Even if you've been to your destination before, order travel brochures online.  They're usually free and a great source of imagery for your journal! 

My next spread is for our first day in Missouri.  We arrive early in the day so I'm sure there will be plenty to document.


We don't have an itinerary (YAY!), but I am planning an art play date with my friend, Barb!  We've never met in person before but have developed a lasting friendship over many hours on the phone.  I included an extra spread because I know that day will require four whole pages!


On this spread, I only removed the top and side sections of pages 2, 3 and 4 so I would have a special place for journaling.


I cut each page about 1/2" shorter than each previous page and added scrapbook paper to the edge of each page for a little more support.  I also added scrapbook paper to the front and last  of the 3 pages.  I have plenty of additional room for journaling and any other small mementos that I want to include for this day.


TIP: Plan on using one spread per day.  This should give you plenty of space for journaling, sketching and photos.


The purple inset on this spread is a pocket I made using 4 pages.  I'm not going to show you how I did this because it was a HUGE pain.  I like how it turned out, but you'll note it's the only one in my journal!


I put a pocket on the back of my pocket. (Clever, huh?  I was out of control!)  The orange part is the front of the pocket folded down.  I used a paper punch to make the decoration and tacked the tag down with a spot of glue after looping it through one of the holes.


I tore about an inch off of the right hand side of the next spread.....and accidentally the one after that, too.  I'm sure it will end up being a happy accident.  I can add some tabs and they won't necessarily have to stick out beyond the covers. (Although I love that look, I'm thinking they will just get ruined during my travels.  That might be something I do once we return home.  Hmmmm.........)


TIP:  Use old or current maps of your destination as part of your backgrounds!

Here's another "flight spread" for our flight to CA.  We have to change planes in CO or TX (the airline can't seem to make up their mind).  I'm sure I'll have plenty to write about!


My first CA spread is a big deal because we've never been on the west coast.  I wanted to have plenty of space for photos and for writing down my initial impressions.  The "CALIFORNIA" is scrapbook paper I was lucky enough to find here in Ohio.  The blue booklet is also scrapbook paper. The only thing that is painted is the left side margin.


When I mentioned to my son that I would be more than happy to prepare some home cooked meals, he LAUGHED!  He assured me that there would be no opportunities for me to cook for them as they are taking us to all their favorite restaurants!  I know this includes Persian, Moroccan, Italian, Mexican, burger joints, and more.  When I heard Persian and Mexican, I knew I wanted to use lots of rich, gemstone colors.


I allowed to spreads per day (that they will be off work and with us all day) because I anticipate lots of carry out menus and photos, and lots of sight seeing.  I'm really looking forward to the very artsy, Laguna Beach!
I made an envelope out of this 12' x12" scrapbook paper that I HAD to use.  I love it!


As you can see, I've only got 1 1/2 spreads to complete - the "flight spread" for the trip home, and the final page will be "Home Sweet Home"........


Because as Dorothy said, "There's no place like home."


THINGS TO CONSIDER FOR YOUR PAGES


  1. Consider your destination. For example, if you're planning a vacation that involves most of your time in the woods, you may want to prep all your pages similarly using lots of earth tones and nature imagery on your borders.
  2. Do you plan on doing a lot of sketching?  You may want to take along loose sheets of paper or another journal that you don't mind tearing pages out of. (I'm going to take along a small journal for quick sketches.)
  3. You might want to number your pages or at least write the day or date somewhere on your pages so you allow enough spreads in your journal.
  4. Remember that your prepped pages are backgrounds and will be mostly covered with photos, sketches and ephemera.  If you're like me, it's easy to become tempted to add too many details.
  5. The more work you put into your journal before your trip, the more fun and pleasurable it will be to add memories and treasures day to day.


I hope you've found this helpful, and I invite you to come back next week for my last installment of Travel Journal.

NEXT WEEK: PART FOUR
Embellishments and add-ons

CELEBRATE * LOVE * CREATE
Related Posts with Thumbnails