Showing posts with label vacation. Show all posts

Saturday, November 10, 2012

Weekend Journal

I have lots of artsy goodness to share with you this weekend, so lets get started!  First, here are my finished canvases currently on display at the 33rd annual East Shore Invitational Art Show.

NEW CANVASES
"Watch Over Me", mixed media/acrylic 24" x 18"

"Shaman's Tale", mixed media/acrylic 11" x 14"

"Hope and Faith", mixed media 12" x 12"

"Tree of Life", mixed media/acrylic 11" x 14"

"A Mother's Love", mixed media/acrylic 11" x 14"

"Inner Knowing", mixed media/acrylic 12" x 12"


It was good to work on canvases for a change.  I'll be completing more canvases in the coming months.

 ART SWAP

Another really fun thing I did in the last couple weeks was to make 10 inspiration cards to trade with April Cole.  If you haven't seen her blog, you need to check it out because you're going to LOVE it!   Here are the cards I made for April:


And here are the wonderful cards that I received from April.  I enjoyed this swap so much that I'm going to host a swap myself very soon, so stay tuned. Thanks very much, April!


TRAVEL JOURNAL

It's been a while, but remember my travel journal?  I'm still continuing work on my pages for our California journey.  It's been slow going due to technical difficulties like my printer running out of ink, resizing photos, using a new laptop, etc., etc., but I've finally have the first few pages almost complete.

California Day One


I still have lots of little details to add to these pages - as well as the other pages in my journal.  I didn't realize how time consuming this would be, but I also didn't realize how rewarding the finished product would be!


I'm going to be showing lots of little details, because I know "The Californians" are eager to see these pages!  Hopefully you'll get some ideas for your own travel journals too, like this little add in booklet. 


This is one of my favorite details!  I wonder what's behind the door?


This little detail was well worth the effort.  It tickles me every single time I open the door!


 The blue mosaic wall at the Sawdust Festival opens to reveal photos I took of the cards that I bought there.  I met some fabulous artists there and saw some fantastic artwork too!


Business cards glued back-to-back make great tabs!  "Thai Bite" is on this side, and "Zona's" is on the other side.


I have photos of my steak breakfast and mimosa for the big empty spot.  My captions and other details must still be added.


We had so many great adventures on the California leg of our trip that I'm sure I'll be working on this journal all winter.  I hope you enjoy seeing it!

PRE-WINTER

Well, in my mind it's official:  Autumn is over with and we're now in the state of limbo that I refer to as "pre-winter".  All of the beautiful leaves have mostly left the trees now, and it's mostly cold and gray now.

Our second puzzle of the season has been completed - an autumn scene as a last-ditch effort from me to hold on to the season. 


Not to worry, though.  There's beauty to behold every day if you're paying attention.  Enjoy the beauty in your day, and have a fabulous weekend!


CELEBRATE * LOVE * CREATE


Monday, September 17, 2012

Monday's Musings

"Tell All Tuesdays" with Jennibellie


One of my favorite artists and journalers, Jenny at Jennibellie Studio, asked me to do an interview for her blog.  I'm honored to have been asked, and I was her featured interview last Tuesday.  To see my interview, go HERE.  If you haven't seen Jennibellie's blog before, it's an absolute MUST.  You're going to love her bright and cheerful posts and all of the amazing tips she shares!

Thank you, Jenny, for asking me to be part of your wonderful interview series!

Vacation, Traveling and Journaling

PHOTO:  Nadia 

I spent last week in "recovery mode".  Honestly, I was so depressed I could barely function.  Living day after day exploring new places and having exciting new adventures had every one of my creative muses dancing with delight.  Returning here to the mundane, mid-west life was a shock to my system.  It's taken me a few days to get back into the groove of things, and I can say that this is the first time EVER I wasn't ready to return home.

I also discovered how much I hate airports.  Did you get that?  I HATE them.  I laugh when I look at this photo that CA daughter took of our arrival at LAX.  I've never been anywhere so poorly marked.  I didn't think we would ever find them.  I was really TICKED OFF by the time we found them.  I was hot.  I was tired.

We had to catch the shuttle from our hotel in St. Louis at 3:30 am, fly into Houston, and then catch our plane to Lax.  The St. Louis airport wasn't too bad to navigate, but TSA didn't arrive until 4:00am so we had to stand around for 20 minutes waiting for them.  The Houston airport was well marked and it was relatively easy for us to find the appropriate boarding gate.

I had my luggage searched two out of the three times we had to go through security.  That will be a post in itself.  Beware of killer bars of soap when you travel.  Yes, SOAP.


All in all, I can't tell you how happy I was on this vacation.  It was wonderful to be with our family members that we love and miss so much.  It was exhilarating to visit so many exciting and breathtaking places, and it was invigorating to escape our everyday life.

I spent Saturday working on my travel journal.  I brought back LOTS of goodies and even more memories.  We did so much running around that there was no "down time" to work in my journal during vacation.  At least all the backgrounds are done!  I'm slowly organizing, printing photos, and gathering my thoughts.  I took over 900 photos in two weeks time.  Does that make you feel panicky? LOL  I promise you won't have to look at them all - maybe. <insert evil laughter here>

That's it for today's post.  I have LOTS and LOTS to catch up on.  I'm still answering your wonderful and much appreciated comments on my posts, visiting your blogs to see what you've been up to, working in my travel journal, and preparing to work on some new pages for the upcoming "Fairies Tea Party" this Sunday.

Come back tomorrow for "Tuesday Tips and Techniques", and I'll show you some of the great FREE and not quite free finds from my adventures.  I've got some great ideas for collecting memorabilia from your travels!

CELEBRATE * LOVE * CREATE 

Wednesday, September 12, 2012

Home Again!

We arrived back home on Sunday night after our whirlwind, two week vacation to Missouri and California.  (I know - I didn't actually tell you when I was leaving, did I? )  We visited Columbia, St. Louis, and St. Charles in Missouri, and Mission Viejo, San Clemente, Laguna Beach, and Los Angeles in California.  We were also gifted with two surprise, overnight stays at Catalina Island and The Grand Canyon in Arizona.  Needless to say, I am inspired, exhausted and adapting to normal life after our extraordinary adventure!

Clouds over California.  Photo:  Keith Thompson

Beyond the first couple days of vacation, there was virtually NO time to spend working in my travel journal, but I was able to keep all of my memorabilia (somewhat) organized so that I can complete it here at home.  I took close to a thousand photos - I promise I won't make you view all of them!

I wasn't able to respond to all of the wonderful comments you've left on my blog, but I did read each and every one and promise to respond to all of them in the next few days.  I also have lots of reading to catch up on from all of your wonderful blog posts.

Now I'm trying to get back into the swing of "normal" life.  I have errands to run, major grocery shopping to do, and lots of art to create.  I'll be back with another "Weekend Journal" post on Saturday.  I've got some great stuff to share with you!

CELEBRATE * LOVE * CREATE

Tuesday, July 17, 2012

Tuesday Tips and Techniques: Travel Journal

PART TWO:  THE COVER

Last week I covered some of the basics for making a travel journal from a composition notebook. ( If you missed that post, go HERE.)  This week, I will show you how I finished my cover.


The first thing I did was texture the cover.  Composition notebook covers are sleek and smooth, and I wanted something that would feel textural.  As luck would have it, Keith received a package in the mail that had oodles and oodles of brown wrapping securing it's contents.  Of course, I snagged the paper for journaling!

I tore 2 pieces of the paper about 3 inches bigger than the cover size, making sure that I had at least one straight edge to place against the spine.  After tearing them to size, I wadded them up as tightly as I could and then carefully straightened the paper back out making it relatively flat.

I applied Liquitex Gloss Gel Medium generously to the front cover and applied the craft paper to the wet cover, carefully aligning the straight edge against the black spine of the notebook.  I then repeated this step with the back cover.  I allowed the covers to dry for 15 minutes or so while I sifted through my decorative papers and stickers.  After the covers were reasonably dry, I cut the craft paper along the covers allowing about an inch for overlap. Using more gel medium, I adhered the remaining craft paper to the inside covers, allowed that to dry, and then applied my paint layer.  Here's the inside back cover at the end of this stage.


To make my journal label, I cut cardstock into the shape I wanted.  I used scrapbook paper to cut out the letters and numbers for the label.  I lightly smudged wet acrylics around the label, letters and numbers to give them an aged look.  I also used gel medium to apply the letters and numbers to the label, and then the label to the journal.  I cut "hinges" from textured scrapbook paper and applied travel stickers to the cover in a random fashion.  As a final step, I applied a thin coat of gel medium to the entire cover.  It feels wonderful!


Next, I moved on to the inside front cover.  I wanted to give this a nice finish so I cut down a piece of scrapbook paper to size and glued it to the cover - again using gel medium.


For the inside back cover, I decided that I wanted to attach an envelope so I would have a place to stash all the wonderful goodies that I know will find their way to me during the course of a day.  Having also recently worked in my Moleskin, I decided that putting an elastic strap on my journal was a brilliant idea!


I decided to use Seal All as adhesive for the elastic.  (Seal All is essentially the same thing as E-6000, but at a much more reasonable price. Hubby turned me on to that when he brought some back from the automotive store.)  I bought the black elastic and gel medium at our local craft store.


I recycled an old mailing envelope to use as my ephemera catch-all.  First, I dabbed acrylic paint on the side of the envelope that would show, and I also painted the inside flap so it would cover up the gummed surface and look pretty.


I also applied more letters from scrapbook paper using gel medium, and applied a light coat of acrylic paint over them as well.

To apply the elastic band to my cover, I made two slits in the cover just large enough to accommodate the elastic.  I bushed the elastic through with the tip of my craft blade and applied a bead of the Seal All along the elastic pressing it firmly in place.


To determine how much elastic to use, I bulked up my journal a bit using the pages I had previously removed from the notebook.  (I'll go into that in detail in Part Three of next week's Tuesday Tips and Techniques)  I used enough elastic to make hold the journal in a lightly snug fashion without stretching the elastic.  


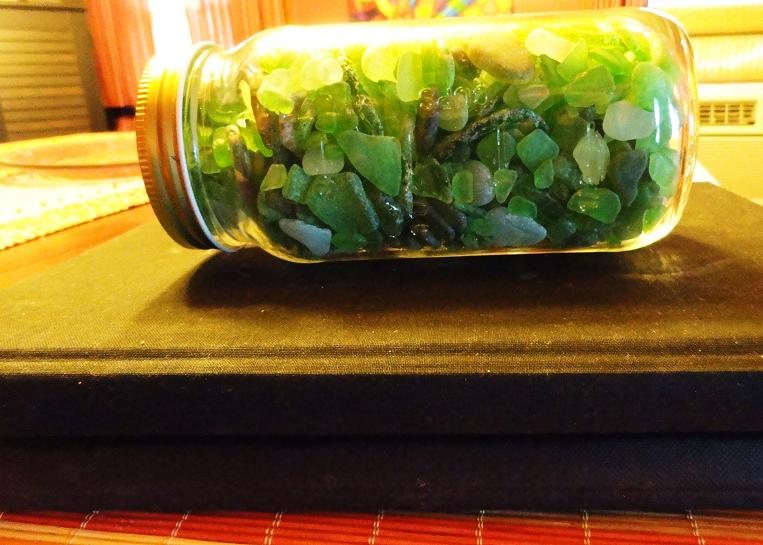
Once the elastic was glued, I applied more Seal All to the back of the envelope and put it in place.  I don't like loose corners, so I secured all four corners with bobby pins.  I wanted to make sure the envelope was firmly adhered to the cover, so I placed a heavy book and a jar of beach glass on top of the journal and let it dry for most of the day.


VOILA!  The finished cover of my travel journal.  I can't wait to show you the inside next week!


THINGS TO CONSIDER FOR YOUR TRAVEL JOURNAL COVER

1. Think about your destination when you design your cover.  Are you going away for an art retreat week? (LUCKY YOU!)  Maybe you would prefer to spray paint a graffiti style cover.  Are you going on a European vacation?  Maybe you would prefer to collage your cover with images that you anticipate seeing.  The possibilities are endless for creating your cover to reflect your destination.

2.  When will you be journaling?  If you plan on journaling ever day (as I do), it's important to make your cover as durable as possible.  3-D items are best left to the end of your trip so they don't get caught on other  items in your purse or luggage.  Remember that applying 3-D items to your cover may also make it nearly impossible to open your journal flat when you want to work in it.

3.  Make your cover so juicy and appealing that you can't stop running your hand across it.  Yep - I'm talking major eye candy.  You want the cover to be as beautiful as the wonderful time you will have on your vacation!

NEXT WEEK:  Part Three - Preparing Your Pages

CELEBRATE * LOVE * CREATE

Related Posts with Thumbnails