 "
"I was happy to send her my favorite journaling formula, and I thought you would enjoy seeing this formula, too. I use this formula when I want to work in my journal but don't have anything specific in mind. In today's post, I'll show you the formula I used to create this two page spread as well as many other spreads.

1. Begin with a gessoed page. Gesso will give you a nice surface to work on and will also add texture to the page as well as increased sturdiness for all of these layers. After the gesso has dried (perhaps with some help of a heat gun or hair dryer), add a block or more of text with a Sharpie, gel pen, or your favorite writing pen.

It doesn't matter what you write. I like to use this opportunity for whatever is on my mind at the time. It could be a rant, lyrics to a song, or random ideas. I usually write these block of texts upside down or sideways. When you've finished writing, cover all or most of it with a thin layer of gesso or acrylic thinned with water.

2. Once this layer has dried (it shouldn't take too long), apply a wash of two colors. I used craft acrylics for this spread. I selected neon yellow and neon green. This wash ties your pages together with cohesive background color. Have fun with this layer! I apply the paint directly to the page in swirls and drips and add water directly to the pages. Let the paint swirl and blend together by holding your journal up and tilting back and forth. Make puddles of your selected paint colors and drop them into the wet background. Blob areas of color with wet paper towel. Flick paint specks on your pages by running your thumb across your loaded brush. Make prints with your finger tips. Have FUN!

3. While your wet pages are drying, pull images from your photo files, grab scrap off your work area. Do it without any rhyme or reason. Just pull images that appeal to you at the moment. Be spontaneous! Pull more than you know you'll use. That will give you plenty to play with.

4. If your pages aren't dry at this point, help them along with your favorite drying device. Begin tearing and cutting images that appeal to you. Don't give it a lot of thought. Just let the magic happen - put The Muse in charge! Pay attention to composition. I tend to work in threes with pattern: I tear each different patterned paper into three unequal sections and place them in an arrangement that's pleasing to me. I use Mod Podge (no surprise to my avid readers!), to apply everything to my pages.

5. Once this has dried, add another wash of two colors. I selected more yellow and burnt sienna for my next wash. I use the same technique for application as I did with the first wash. This also helps to tie both pages together and pushes everything into the background. Don't forget to let some of your original wash show through. This helps to add depth to your page. At this stage, I begin looking for imagery. When I looked at these pages, I thought the checkered pattern on on the left looked like hair.
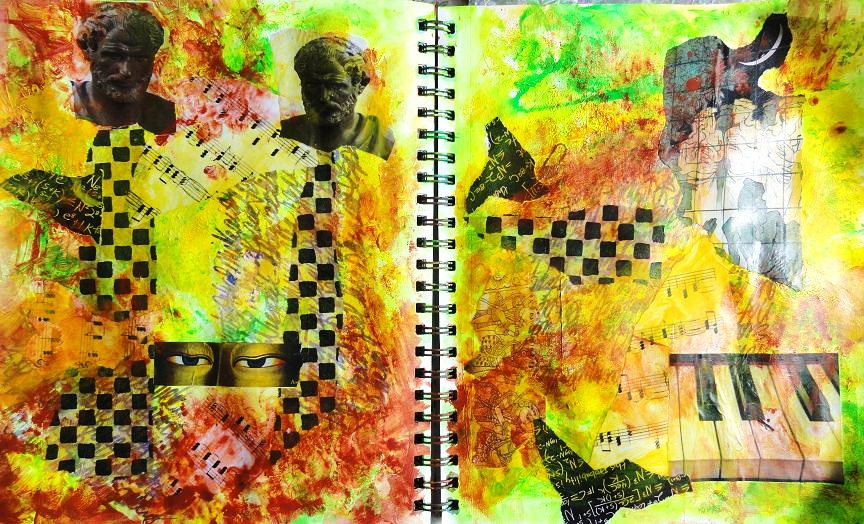
6. At this point, I begin making my light areas lighter and my dark areas darker. I also begin adding more opaque layers of color, especially near the collaged items. I don't want the collaged items to look like they're just stuck on - they need to blend in with the rest of the pages and become part of the whole design.

7. Now it's time to add details. I added splotches of transparent, raw umber acrylic ink. I dribbled and smudged the ink along the outer edges of the pages to add depth and a nice border. I completed the details of the face, and I darkened some of the areas. I usually also add two or three other collaged elements at this point - mostly just because I like the way it looks! The final step is to write another couple lines of journaling. At this stage, I generally write only one or two sentences that reflect the imagery on my pages.
And there you have it! A journal spread that's cohesive in color, pattern and composition. More often than not, you'll find items that you've incorporated are both symbolic and literal in relation to what you initially wrote in your first blocks of text.
I hope you find this formula for journaling helpful as you continue your own journaling endeavors. If you give this method of try, I hope you'll show me your results. If you have any questions or additional thoughts, comments are encouraged. I love hearing from you, and I do believe I have solved the annoying word verification issue! Happy Creating - and Happy First Day of Spring!
CELEBRATE * LOVE * CREATE


